
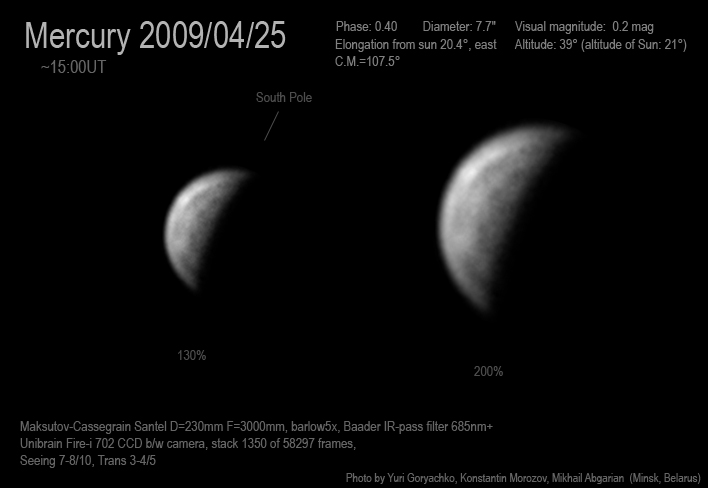
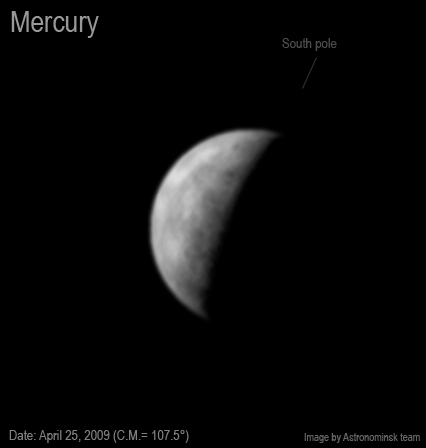
Mercury on April 25, 2009
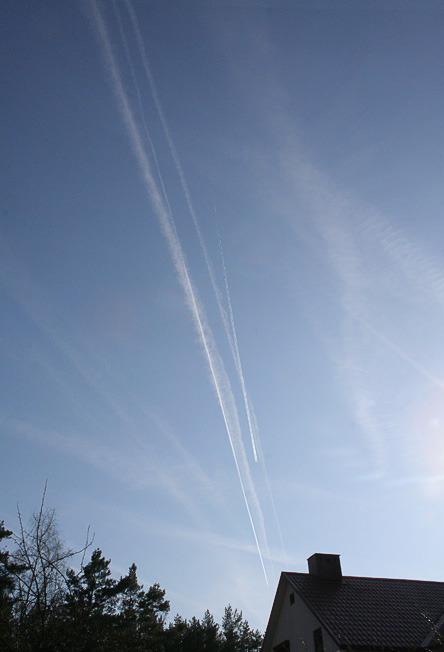
Getting Mercury images is a non-trivial process, which is proven by the history of this picture. Video materials were taken on April 25, 2009, while final processing was only finished a year after. The first attempts at processing didn't bring the desired results. Sorting frames according to their quality turned out to be problematic, and there was a total of 58297 frames. Despite careful selection of parameters, Registax would absolutely refuse to do that. The reason for that was a low contrast of the image (imaging was conducted at daytime) and constantly changing brightness of sky background and the planet - during imaging the sky was full of semi-transparent cirrus clouds and condensation trails from the airplanes (which is by the way is a sure sign of a stable upper levels of the atmosphere).
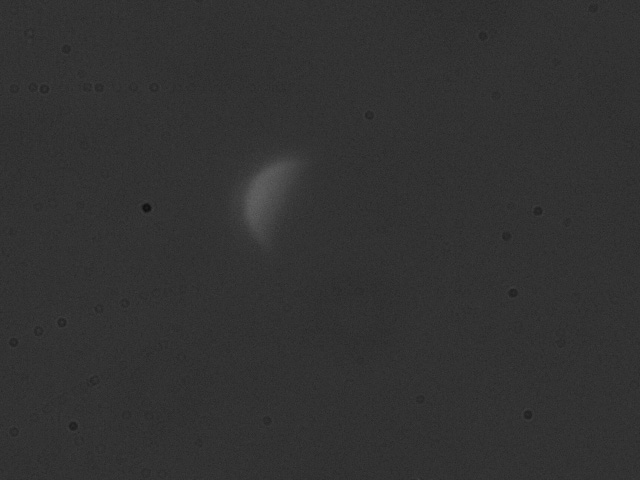
The sky in the direction of Mercury In spring of 2009 it was decided to postpone the processing till better times, especially since we had lots of other raw materials that required its own attention. The situation has changed only a year later, when I braced for the manual frame selection, which became the decisive factor in processing of this material. But before I started the selection, I had to calibrate all frames with flat-field (luckily we took that), as the camera sensor had dust on it. The images below show a single frame before and after calibration (move the mouse over the image to see the change).
Single frame before and after calibration in Maxim DL It was impossible of course to look through 60 000 frames, so I significantly simplified the task for myself by selecting the best frames with Registax (to the extent it was possible to do). After two stages of selection, I ended up with 16000 frames. Further reduction with automated selection was no longer possible, as good frames would end up mixed with bad ones everywhere, despite careful quality sorting with all tools available in Registax. The interesting moment was that because of changing brightness of the sky background sharp frames in a calibrated and quality sorted video were grouped in the beginning and in the center of the video (a distribution of quality graph in Registax had two bulges). Then followed the longest and most painful operation of looking through the remaining 16000 frames and deletion of the ones that were blurred and distorted by turbulence. This took a couple of days. As a result 1724 of the best frames were selected, and those were resized to the 200% of the original size. The problems didn't end there. It turned out that the stacking programs (and I experimented with Registax and AutoStakkert! v0.0.1.15) can't entirely correctly stack such complex material. Since individual frames differed in brightness of both the background and the planet, the image alignment wasn't exact. I noticed this when watching the optimization process in Registax and pressing the button "View Random Frame" in AutoStakkert. Some frames would diverge from the alignment for up to 1/3 of the disk. As a result I got stacks that wouldn't get sharp and had lots of noise. The best result I obtained in AutoStakkert in the "Edge" mode with stacking along the limb line. Although depending on the size and position of the align box and also the number of frames in the stack, the obtained results would differ slightly from each other in fine detail. This didn't satisfy me completely and I started to look for some other way. Suddenly I had an idea to try Maxim DL as a stacking program. I had never used that application before to stack planetary images, as it doesn't have any options for the Planetary stacking mode. Regardless of that the first stack caused a bit of a shock - this was better than anything that I did before. Maxim DL with its histogram optimization of each individual frame worked perfectly for aligning such a complex material. Stacks of different length would sharpen well, showed very similar results and differed only in noise level. I settled on a stack of 1350 frames. To tell you the truth, performance of Maxim DL turned out to be a pleasant discovery for me. The following processing was extremely simple. Wavelets were applied in Registax to the obtained stack and that was it, no noise reducers, no unsharp masks, no other filters. The only thing, I reduced the excessive brightness of the limb that was a result of application of wavelets on the contrast transition between the sky background and the planet edge. For those willing to experiment, we are posting the result of stacking (tif16) of the best 1350 frames:
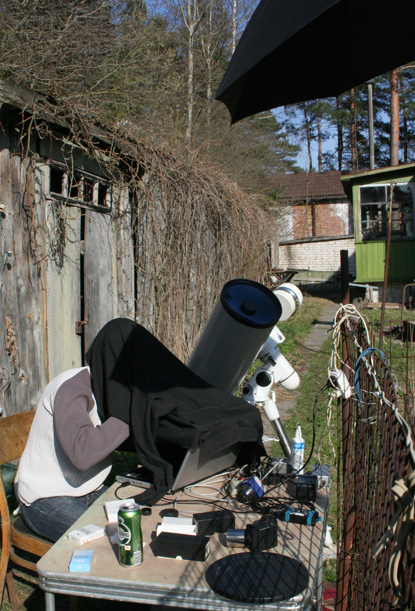
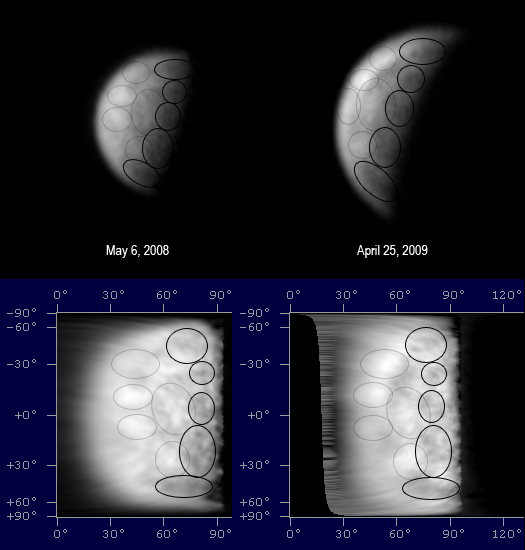
The process of Mercury imaging Comparison of two Mercury images.Analysis of the obtained result and its comparison with our other pictures of Mercury showed that this photo shows approximately the same part of the planet as the image taken on May 6, 2008, with only difference that in each case the planet was turned slightly differently to the observer. Still these two pictures can be compared with each other. For convenience of such comparison both images were transformed into cylindrical (cartographic) projections.
Despite the fact that processing of the May 6 2008 image was performed using an entirely different methodology, the major albedo markings match pretty well on both images. The main and the most characteristical detail at the center of the observed Mercury sickle (we called it "a star", "a human", "a bunch of five" among ourselves) is clearly visible on both images. Besides other dark and bright spots mostly match. This gave me an idea of stacking both images into one using cylindrical transformations in WinJUPOS. Averaged image obtained from the results of imaging on May 6, 2008 and April 25, 2009 and shown as it would look on the later date you can see below.
The sum of two images
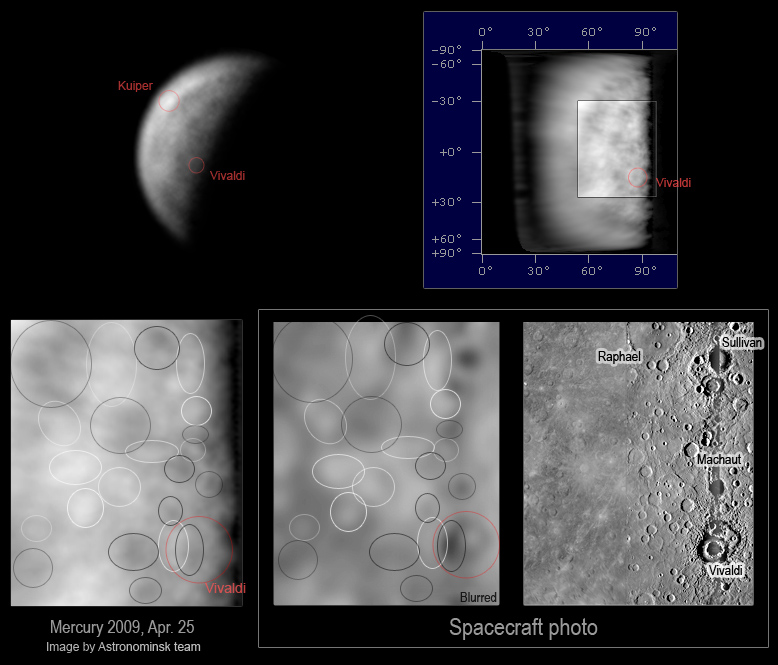
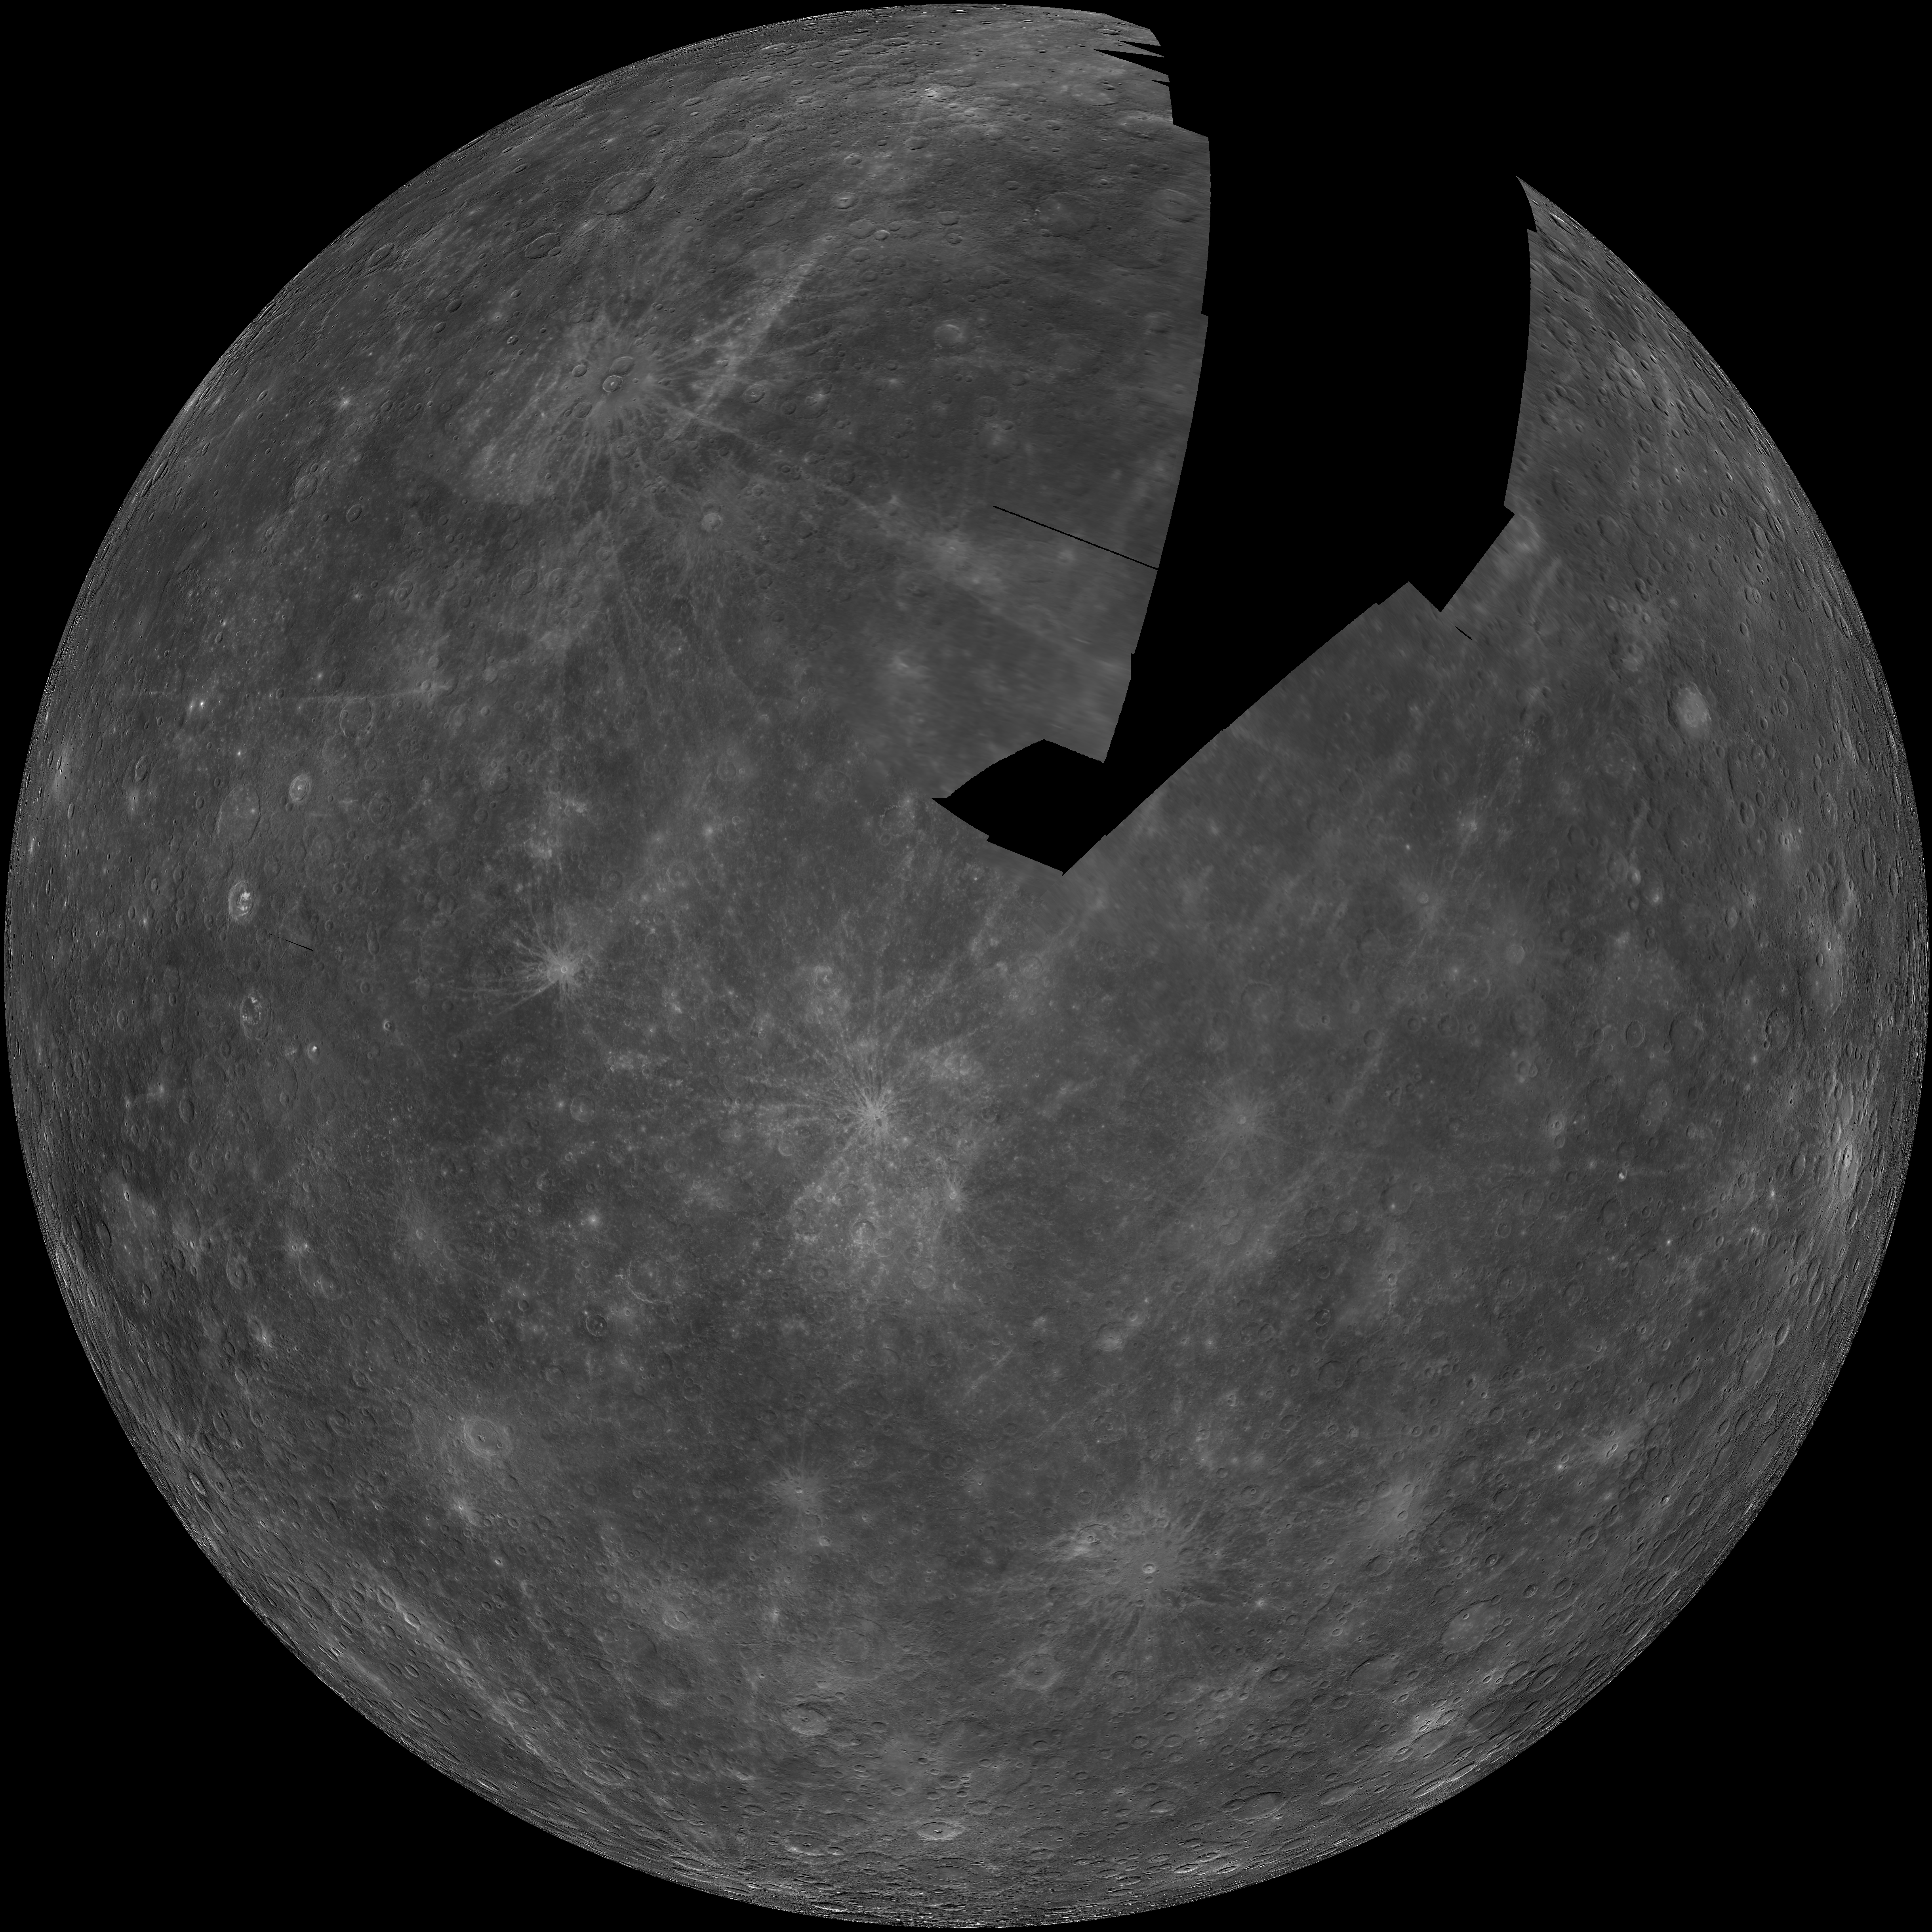
Comparison with the spacecraft images.
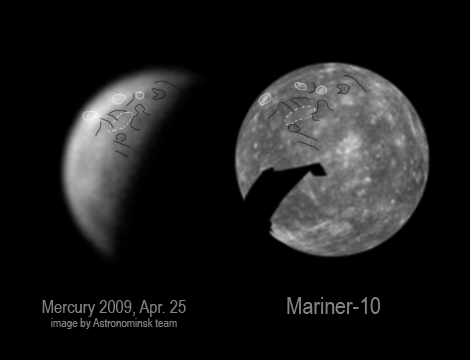
The image of Mercury in the 57-92° longitude Comparison of the obtained result with the images and maps obtained by spacecrafts also showed a good correlation. For our equipment and imaging conditions I think the result we got is quite good. A pleasant surprise was a fact that, with some caution, we can say that our picture practically resolved a Mercury Vivaldi crater 210 kilometers in diameter. You can guess the rim illuminated with sunlight and a shadow cast by it and a general ring structure of the basin of this crater. Also a good positioning of the central meridian on our picture allowed to directly compare our image with mosaic obtained by Mariner-10, which has the same details in a similar position relative to the planet limb. Despite the different lighting conditions on two images the major similarities are easily noticeable.
Y. Goryachko with M. Abgarian and K. Morozov (May 2010)
|
 .
.
All images © 2005-2020 Astronominsk | Hosting provided by ObjectStyle LLC, a software development company.